Discover Bible journaling with our comprehensive guide covering supplies, techniques, and spiritual benefits. Learn how to creatively engage with Scripture and deepen your faith through this meaningful practice.
Table of Contents
- Introduction
- What is Bible Journaling?
- How Do I Start Bible Journaling as a Beginner?
- What Supplies Do I Need for Bible Journaling?
- What is the Best Journaling Bible for Beginners?
- Can I Use Regular Pens in a Journaling Bible?
- How Do I Prevent Ink from Bleeding Through Bible Pages?
- What Are No-Bleed Bible Journaling Supplies?
- How Do I Choose Verses to Journal About?
- What Creative Techniques Can I Use for Bible Journaling?
- Are There Journaling Bibles with Wide Margins?
- How Do I Use Washi Tape in Bible Journaling?
- What Are the Best Highlighters for Bible Journaling?
- Can I Bible Journal Digitally?
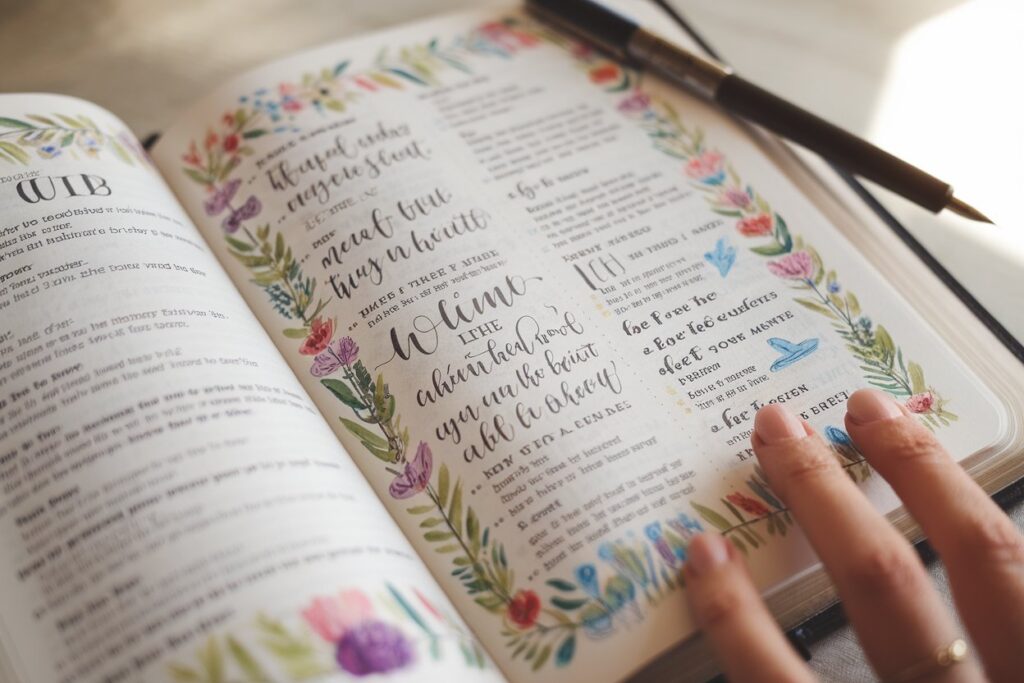
- How Do I Incorporate Art or Watercolor into Bible Journaling?
- What Are Some Bible Journaling Prompts?
- Creative Challenge Prompts
- How Do I Reflect on Scripture While Journaling?
- Is Bible Journaling a Form of Worship?
- How Do I Date or Organize Journal Entries in My Bible?
- What Are the Benefits of Bible Journaling?
- How Do I Avoid Ruining My Bible Pages While Journaling?
- Conclusion
Introduction
Have you ever found yourself reading the Bible and wishing you could somehow make the words leap off the page and into your heart? Or maybe you’ve seen those beautiful, illustrated Bible pages on social media and wondered, “Could I do that too?” If so, you’re not alone. As someone who discovered Bible journaling after years of traditional Bible study, I can tell you it’s revolutionized my relationship with Scripture.
Bible journaling isn’t just a trendy hobby—it’s a meaningful spiritual practice that combines creativity with devotion, allowing you to engage with God’s Word in deeply personal ways. Whether you’re artistically gifted or can barely draw a stick figure (that’s me!), there’s a place for you in the world of Bible journaling.
In this comprehensive guide, we’ll explore everything from getting started as a complete beginner to advanced techniques that will help you express your faith creatively. I’ll share what I’ve learned along my own journaling journey, including the best supplies that won’t damage your Bible, practical techniques to try, and the profound spiritual benefits that await you.
So grab your favorite pen, and let’s dive into the colorful, faith-filled world of Bible journaling together!
What is Bible Journaling?
Bible journaling is a creative approach to engaging with Scripture that combines traditional Bible study with artistic expression. At its core, it’s about responding to God’s Word in tangible, visual ways—whether through writing, drawing, painting, or other creative techniques.
Unlike traditional note-taking, Bible journaling often incorporates artistic elements that help you connect emotionally and spiritually with the text. The goal isn’t to create museum-worthy art (though some journalers certainly do!) but to deepen your understanding and internalization of Scripture through creative engagement.
When I first started Bible journaling, I was intimidated by the gorgeous spreads I saw online. But I quickly learned that it’s not about artistic perfection—it’s about creating a personal, meaningful conversation with God through His Word.
Bible Journaling Styles
There are several approaches to Bible journaling, and the beauty is that you can choose what works best for you:
- Word-focused journaling: Emphasizes writing reflections, prayers, and insights in the margins of your Bible
- Artistic journaling: Incorporates drawings, paintings, and other visual elements to illustrate verses or themes
- Devotional journaling: Combines Scripture reading with guided prompts and reflections
- Verse mapping: Breaking down verses word by word, exploring definitions and connections
- Mixed-media journaling: Uses a variety of materials like stickers, washi tape, stamps, and more
I personally started with simple word-focused journaling and gradually incorporated more artistic elements as I gained confidence. Remember, there’s no “right way” to journal—it’s about what helps you connect with God’s Word.
How Do I Start Bible Journaling as a Beginner?
Starting your Bible journaling journey doesn’t have to be complicated or expensive. Here’s a simple step-by-step approach that worked for me:
1. Choose Your Bible
Your first decision is whether to use your current Bible or invest in a dedicated journaling Bible. If you’re just testing the waters, you can start with your regular Bible and some sticky notes or a separate notebook. But if you’re ready to commit, a journaling Bible with wide margins gives you dedicated space for your creative expressions.
I remember feeling hesitant about writing in my Bible at first—it felt almost sacrilegious! But then I realized that engaging with Scripture this way was actually honoring God’s Word by spending more time with it and internalizing it more deeply.
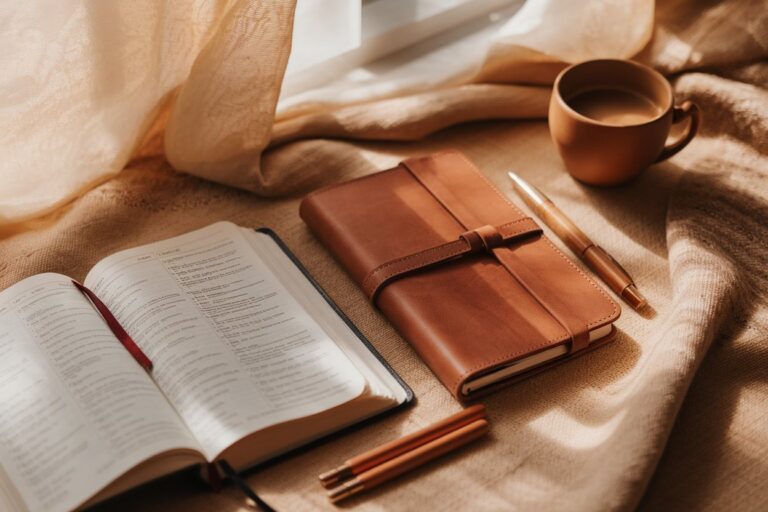
2. Gather Basic Supplies
You don’t need an art store’s worth of supplies to get started. Begin with these basics:
- No-bleed pens (Pigma Microns or Zebra Mildliners are great options)
- Colored pencils (Crayola Twistables work well on Bible paper)
- A few rolls of washi tape for decorative elements
- Page tabs or sticky notes for marking pages
I started with just three pens and some colored pencils, and that was plenty for my first few months of journaling.
3. Start Simple
For your first entry, choose a verse that speaks to you personally. Write it out in the margin, adding your thoughts and a simple decoration like a border or a small symbol. Don’t worry about creating elaborate artwork—focus on engaging with the text.
My first journaling entry was simply highlighting Philippians 4:13 (“I can do all things through Christ who strengthens me”) and writing a short prayer in the margin. It wasn’t Instagram-worthy, but it was meaningful to me.
4. Develop a Routine
Set aside regular time for Bible journaling, even if it’s just 15 minutes a few times a week. Consistency helps you develop both the habit and your skills.
I find that journaling first thing in the morning helps me start my day with God’s perspective, but evening journaling can be a wonderful way to reflect on your day through the lens of Scripture.
5. Focus on the Message, Not Perfection
Remember that Bible journaling is primarily about connecting with God, not creating perfect artwork. Some days, your journaling might be just writing; other days, you might feel inspired to create something more elaborate.
The first time I tried to draw something in my Bible, I made a mistake and nearly gave up the whole practice! But then I realized that God cares about my heart, not my artistic abilities, and that freed me to continue.
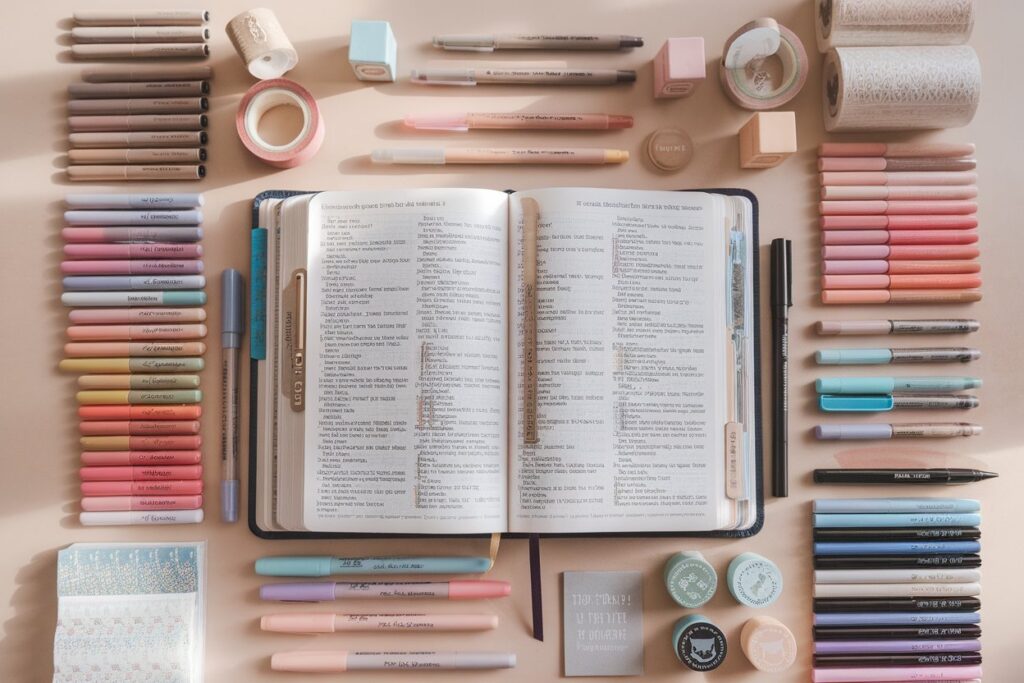
What Supplies Do I Need for Bible Journaling?
The right supplies can make your Bible journaling experience both enjoyable and successful. Here’s what I recommend based on years of experience:
Essential Bible Journaling Supplies
1. Journaling Bible
A good journaling Bible is the foundation of your practice. Look for these features:
- Wide margins: At least 2 inches for notes and art
- Thicker paper: 36 GSM (grams per square meter) or higher helps prevent bleed-through
- Single-column layout: Provides more room for creativity
- Translation you connect with: Choose a version you understand and enjoy reading
My top recommendations for beginners include:
- NIV Journal the Word Bible: Features wide, lined margins and thicker paper
- ESV Single Column Journaling Bible: Clean layout perfect for notes and simple art
- Illustrating Bible by Dayspring: Designed specifically for art journaling with spiral binding and extra-thick pages
I started with the ESV Single Column and still use it for text-focused journaling, while using the Illustrating Bible for more artistic entries.
2. No-Bleed Pens and Markers
Preventing bleed-through is crucial when writing on thin Bible pages. These options work well:
- Pigma Micron Pens: Archival quality with fine tips for detailed work
- Tombow Fudenosuke Brush Pens: Perfect for beautiful lettering and calligraphy
- Zebra Mildliners: Dual-tip highlighters that are gentle on Bible paper
I’ve tried dozens of pens over the years, and these consistently perform well without damaging the delicate pages.
3. Coloring Tools
For adding color without damage:
- Colored pencils: Crayola Twistables or Prismacolor Premier pencils
- Watercolor pencils: For light washes (use sparingly)
- Bible-safe highlighters: Accu-Gel Bible Hi-Gliders or Zebra Mildliners
A word of caution: I learned the hard way that regular markers will bleed through most Bible pages. Stick with pencils if you’re uncertain.
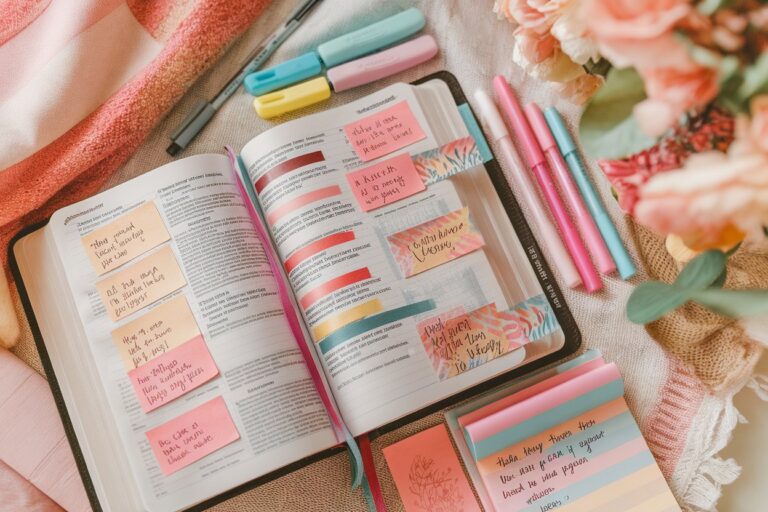
4. Decorative Elements
These add visual interest without requiring artistic skills:
- Washi tape: For borders, tabs, or highlighting sections
- Bible journaling stickers: Pre-designed elements for verses and themes
- Alphabet stamps: For creating titles or emphasizing words
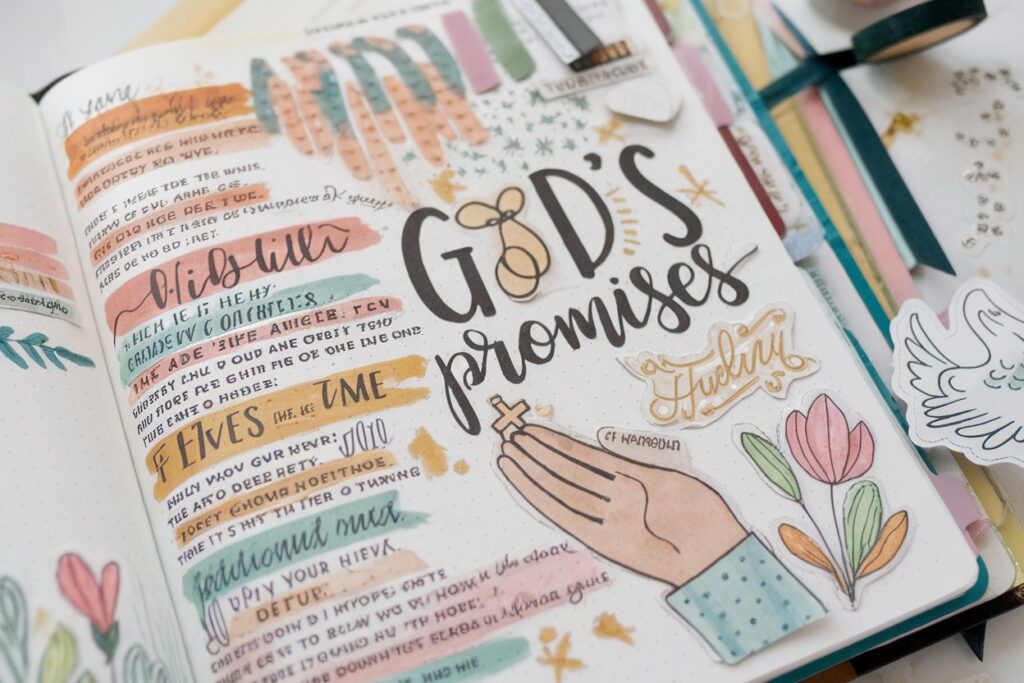
Washi tape became my secret weapon when I first started—it adds color and design elements with zero artistic talent required!
Beginner-Friendly Kits
If you’re starting out, an all-in-one kit can be a great investment:
- Mr. Pen 18-Pack No-Bleed Bible Journaling Kit: Includes pens, highlighters, stickers, and washi tape
- Illustrated Faith Starter Kit: Contains basic supplies and instructional materials
I wish these had been available when I started—they would have saved me from buying supplies that didn’t work well with Bible paper.
Intermediate and Advanced Supplies
As you progress, you might want to explore:
- Watercolors: Artist’s Loft sets are affordable and gentle enough for Bible pages
- Acrylic paint: Use sparingly with a clear gesso base
- Specialty tools: Stencils, embossing powders, or calligraphy pens
I waited about six months before trying watercolors, and I’m glad I built my confidence with simpler tools first.
Digital Bible Journaling Tools
For those who prefer a tech approach:
- Procreate App: For digital Bible journaling on an iPad
- GoodNotes: Digital notebook for journaling on tablets
- YouVersion Bible App: Offers verse images and reading plans for inspiration
During the pandemic, I experimented with digital journaling and found it quite freeing—no worries about mistakes or bleed-through!
What is the Best Journaling Bible for Beginners?
Choosing the right Bible can make a huge difference in your journaling experience. After trying several options, here are my top recommendations for beginners:
Best Overall: ESV Single Column Journaling Bible
This Bible offers the perfect balance of features for new journalers:
- 2-inch margins provide ample space for notes and simple art
- 7.5-point text size is readable without making the Bible unwieldy
- Cream-colored pages reduce eye strain
- 38 GSM paper stands up to most pens and light coloring
I started with this Bible and still use it regularly for sermon notes and verse reflections.
Best for Artists: Illustrating Bible by Dayspring
If you know you want to focus on the artistic side of Bible journaling:
- Extra-thick 75 GSM paper handles watercolors and other wet media
- Spiral binding lays completely flat for easier working
- Larger format provides maximum creative space
- Unlined margins offer flexibility for different art styles
I splurged on this as my second journaling Bible, and it’s perfect for more elaborate artistic entries.
Best Budget Option: NIV Journal the Word Bible
For those mindful of cost but wanting quality:
- Affordable price point (typically under $30)
- Lined margins help keep notes neat
- Hardcover version is durable for regular use
- Thinner than premium options but still works well with the right supplies
A friend started with this Bible and created beautiful entries without breaking the bank.
Best for Note-Takers: NKJV Journal the Word Reference Bible
If your focus is more on written reflection than artwork:
- Cross-references for deeper study
- Lined margins guide your writing
- Slightly thicker paper than standard Bibles
- Elegant, minimalist design
This is what I recommend to friends who want to focus on theological reflection rather than artistic expression.
| Bible Type | Margin Width | Paper Weight | Best For | Price Range |
|---|---|---|---|---|
| ESV Single Column | 2 inches | 38 GSM | All-around use | $30-40 |
| Illustrating Bible | 3+ inches | 75 GSM | Artists | $60-100 |
| NIV Journal the Word | 2 inches | 36 GSM | Budget-conscious | $20-30 |
| NKJV Reference | 1.75 inches lined | 40 GSM | Note-takers | $35-45 |
Can I Use Regular Pens in a Journaling Bible?
This is one of the most common questions I hear from beginners, and the answer is: it depends on the pen and your Bible.
Most regular ballpoint pens, gel pens, and markers will bleed through standard Bible paper. Even journaling Bibles, which typically have thicker pages than standard Bibles, can be susceptible to bleed-through with the wrong pens.
I learned this lesson the hard way when I used a regular Sharpie marker in my first journaling Bible—the ink not only bled through that page but affected several pages behind it!
Testing Your Pens
Before using any pen in your Bible, I recommend testing it on the back page or in an inconspicuous spot. Apply the pen, wait a few minutes, and check the reverse side for bleeding or shadowing.
Safe Pen Options for Bible Pages
Based on my experience, these pens work well on most Bible paper:
- Pigma Micron Pens: Available in various tip sizes (01, 03, 05) for different writing needs
- Sakura Gelly Roll: The white pen is especially useful for writing on darker backgrounds
- Tombow Fudenosuke Brush Pens: Great for calligraphy and varied line weights
- Staedtler Triplus Fineliners: Fine tips and minimal bleed-through
- Faber-Castell PITT Artist Pens: The “S” or small tip works well for Bible paper
I keep a small collection of these tested pens in my journaling basket, so I’m always ready to journal without worrying about damaging my Bible.
Pens to Avoid
In general, steer clear of:
- Sharpies and permanent markers
- Most gel pens (with some exceptions like Sakura Gelly Roll)
- Fountain pens with wet inks
- Alcohol-based markers like Copics
These typically saturate the paper too much and cause significant bleed-through.
How Do I Prevent Ink from Bleeding Through Bible Pages?
Preventing bleed-through is one of the biggest challenges in Bible journaling. Here are the techniques I’ve found most effective:
1. Choose the Right Supplies
As mentioned above, using Bible-friendly pens is your first line of defense. Stick with the recommended pens and avoid heavy ink application.
2. Use a Buffer Sheet
Place a piece of card stock or several sheets of paper behind the page you’re working on. This won’t prevent bleed-through, but it will protect the following pages from any ink that does seep through.
I keep a thin plastic sheet in my Bible specifically for this purpose—it’s more durable than paper and easy to move from page to page.
3. Apply Gesso for Heavy Media
If you want to use watercolors, acrylics, or other wet media, consider applying a thin layer of clear gesso to your Bible page first. Gesso creates a protective barrier that prevents bleed-through while providing a better surface for paints.
The first time I used gesso was intimidating—it seems counterintuitive to add something to your Bible page! But it creates a wonderful surface for more elaborate art without damaging your Bible.
4. Try the Dry-Brush Technique
When using paints, remove most of the moisture from your brush before applying it to the page. This “dry-brush” technique adds color with minimal water, reducing the risk of bleed-through.
I often blot my brush on a paper towel until it’s almost dry before touching it to my Bible page.
5. Layer Techniques
Start with lighter mediums like colored pencils as your base, then add details with no-bleed pens. This layering approach allows you to add color without saturating the page.
6. Consider Page Inserts
If you’re worried about damaging your Bible or want to use heavier media, try creating art on separate paper and attaching it to your Bible page with washi tape or a removable adhesive.
I sometimes create elaborate pieces on watercolor paper and then tip them into my Bible with decorative washi tape along one edge.
What Are No-Bleed Bible Journaling Supplies?
“No-bleed” supplies are specifically designed or tested to work well with thin Bible pages. Here are the categories and products I recommend:
No-Bleed Pens and Markers
- Pigma Micron Set: My go-to for writing and line art
- Zebra Mildliners: Gentle highlighters with dual tips
- Tombow Fudenosuke: Perfect for lettering and calligraphy
- Bible-specific highlighters: Accu-Gel Bible Hi-Gliders are designed specifically for Bible paper
No-Bleed Coloring Options
- Colored pencils: Prismacolor Premier or Crayola Twistables
- Watercolor pencils: Faber-Castell or Derwent (use lightly)
- Gelatos: Creamy color that can be applied lightly
- Bible-safe paints: Illustrated Faith or Prima Marketing watercolors
Accessories and Tools
- Clear gesso: Creates a protective layer for wet media
- Bible mat: Protects pages underneath your work area
- Page protectors: Clear inserts that shield delicate pages
- Artist’s tape: Gentler than regular masking tape
I keep a dedicated “Bible-safe” supply pouch, so I never accidentally grab the wrong pen when I’m journaling.
How Do I Choose Verses to Journal About?
Selecting meaningful verses for journaling is a personal process. Here are some approaches I’ve found helpful:
Follow a Reading Plan
Many Bible apps and websites offer topical or chronological reading plans. As you read, highlight verses that stand out to you for journaling.
I used the YouVersion Bible app’s verse of the day as my journaling prompt for my first month—it provided a simple starting point each day.
Focus on Themes
Choose a theme that’s relevant to your life right now, such as:
- Peace and anxiety
- God’s love
- Faith in difficult times
- Thankfulness and gratitude
- Identity in Christ
Then, search for verses related to that theme. Bible Gateway’s topical search is excellent for this purpose.
When I was going through a particularly anxious season, I spent two months journaling verses about God’s peace and presence. It was incredibly therapeutic.
Capture Sermon Notes
Use Bible journaling to record insights from sermons or Bible studies. This helps you remember and apply what you’ve learned.
Respond to Life Events
When facing challenges or celebrating joys, find verses that speak to your situation. Journaling can be a powerful way to process your experiences through the lens of Scripture.
After a job loss, I journaled through Jeremiah 29:11 and other verses about God’s faithfulness. Looking back at those entries now reminds me of how God worked in that situation.
Use Journaling Prompts
Bible journaling prompts provide specific verses and reflection questions. Some of my favorites include:
- What does this verse reveal about God’s character?
- How does this truth apply to my current circumstances?
- What one word or phrase stands out in this passage, and why?
- How might my life look different if I fully believed this verse?
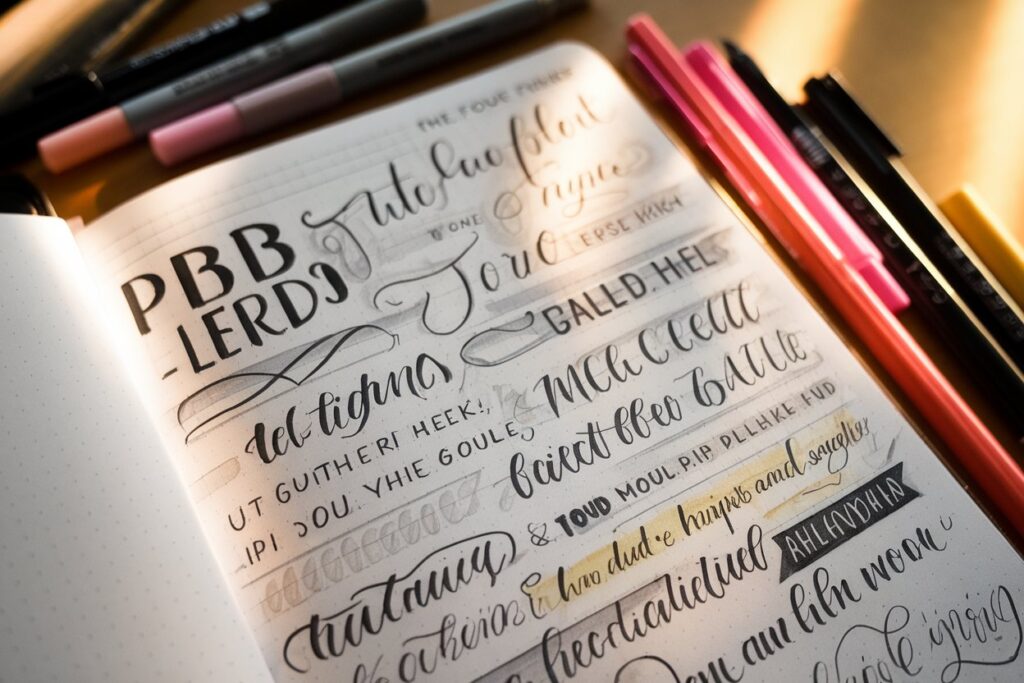
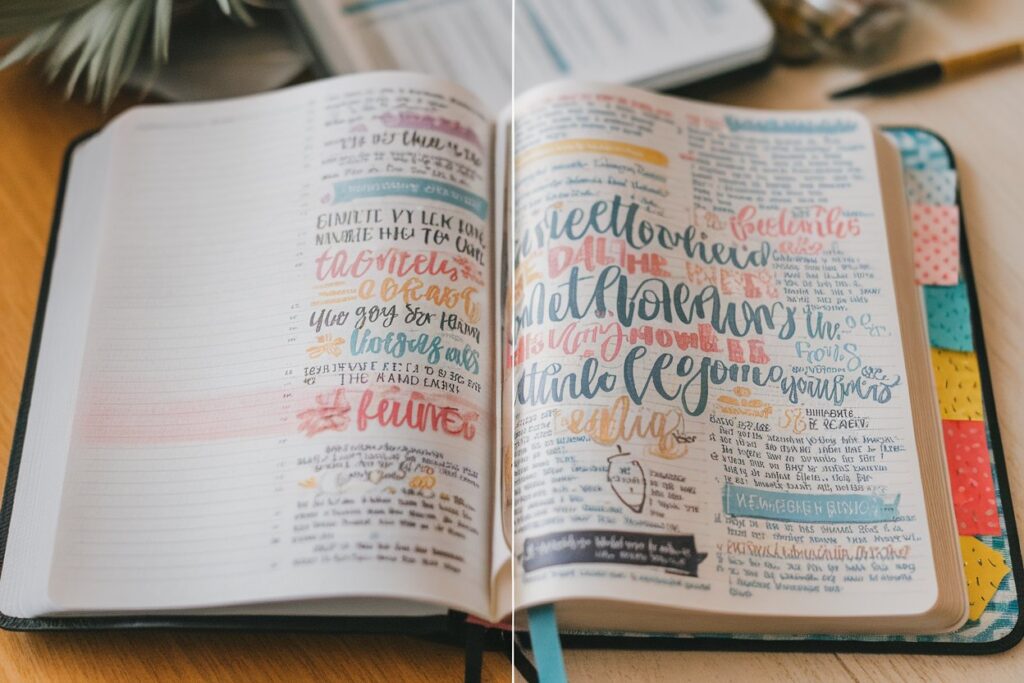
What Creative Techniques Can I Use for Bible Journaling?
The creative possibilities in Bible journaling are endless! Here are some techniques I’ve explored and enjoyed:
1. Hand Lettering and Typography
Even if you don’t consider yourself artistic, you can create beautiful text-focused pages:
- Try different lettering styles for keywords
- Vary the size of words for emphasis
- Frame important phrases with simple borders
- Use block letters filled with patterns
I practiced basic hand lettering by watching YouTube tutorials for 10 minutes a day, and the improvement in my journaling was dramatic.
2. Simple Illustrations and Symbols
You don’t need to be a professional artist to add meaningful visuals:
- Use simple symbols related to the verse (anchor for hope, heart for love)
- Try basic line drawings (mountains, trees, crosses)
- Incorporate geometric shapes as borders or backgrounds
- Trace images using graphite paper if you’re not confident drawing freehand
I often use simple symbols in the margins—a small flame for verses about the Holy Spirit, a mountain for God’s strength, a heart for love.
3. Washi Tape Designs
Washi tape is a no-skill-required way to add color and pattern:
- Create borders around pages or verses
- Make tabs for favorite passages
- Form simple geometric designs
- Layer different patterns for artistic effects
This was my gateway technique—colorful washi tape made my early journaling look intentional and pretty with zero artistic skill!
4. Watercolor Techniques
For those ready to try painting:
- Create simple watercolor washes as backgrounds
- Try the “wet-on-dry” technique for controlled color
- Use watercolor pencils for precision
- Add splatter effects for a modern look
Remember to prepare your page with gesso first or use a very dry brush technique.
5. Stickers and Printables
Pre-designed elements save time and add professional touches:
- Use Bible journaling stickers for margins
- Print and trace designs using graphite paper
- Create your own templates for repeated elements
- Look for free printables online
I keep a folder of printables organized by theme, so I always have inspiration when I need it.
6. Mixed Media Approaches
For more advanced journalers:
- Combine multiple techniques on one page
- Layer different mediums (pencil, then pen, then light color)
- Incorporate collage elements like ticket stubs or photos
- Try embellishments like fabric tape or vellum overlays
Don’t be afraid to experiment and develop your own unique style!
Are There Journaling Bibles with Wide Margins?
Yes! Wide-margin Bibles are specifically designed for journaling. Here are some options with generous margins:
Top Wide-Margin Bible Options
- ESV Single Column Journaling Bible: Features 2-inch unlined margins
- NASB Journal the Word: Offers 1.75-inch lined margins
- Illustrating Bible by Dayspring: Provides the widest margins at 3+ inches
- CSB Notetaking Bible: Includes 1.75-inch margins with subtle dotted lines
I prefer unlined margins for flexibility, but many journalers appreciate the structure of lined margins for neater notes.
Extra-Wide Margin Options
If standard margins don’t provide enough space for your creativity:
- Interleaved Bibles: These include a blank page between each page of text, essentially doubling your journaling space
- Journaling Bible companion notebooks: Separate notebooks that coordinate with specific Bible editions
- Loose-leaf Bibles: Allows you to insert additional pages where needed
After filling my first journaling Bible, I switched to an interleaved version for more elaborate entries.
Comparing Margin Sizes
| Bible | Margin Width | Lined/Unlined | Paper Weight |
|---|---|---|---|
| Standard Bible | 0.25-0.5 inches | Unlined | 28-32 GSM |
| Basic Journaling Bible | 1.5-1.75 inches | Varies | 36-38 GSM |
| Wide-Margin Journaling Bible | 2+ inches | Varies | 38-42 GSM |
| Illustrating Bible | 3+ inches | Unlined | 75 GSM |
| Interleaved Bible | Full blank pages | Unlined | Varies |
How Do I Use Washi Tape in Bible Journaling?
Washi tape is one of my favorite Bible journaling tools because it’s versatile, removable, and requires zero artistic skill. Here are some creative ways to use it:
1. Create Page Tabs
- Cut small pieces of washi tape and fold them over the edge of important pages
- Use different patterns for different topics or books
- Write on the tabs with fine-point pens for easy reference
I color-code my tabs: blue for verses about peace, yellow for promises, green for growth, etc.
2. Make Decorative Borders
- Line the edges of your journaling space with washi tape
- Create frames around special verses
- Layer different widths and patterns for unique borders
- Use decorative-edge scissors to cut tape for fancy borders
A simple washi tape border instantly elevates even the simplest handwritten notes.
3. Highlight Important Sections
- Place thin washi tape alongside verses you want to emphasize
- Use transparent tape for subtle highlighting
- Create color-coding systems for different themes or promises
4. Cover Mistakes
One of washi tape’s most practical uses is covering errors:
- Place a piece of tape over writing or art mistakes
- Write your correction on top of the tape
- Turn the mistake into a decorative element
This has saved many of my journaling pages from frustration!
5. Create Backgrounds
- Lay down strips of washi tape side by side to create a patterned background
- Use wider tapes to cover larger areas quickly
- Overlap different patterns for unique effects
6. Attach Extras
- Use washi tape as hinges to attach prayer cards, photos, or additional journaling space
- Secure loose items without damaging pages
- Create flip-outs for extended notes
I sometimes write longer reflections on cardstock and attach them with washi tape when I need more space than the margin provides.
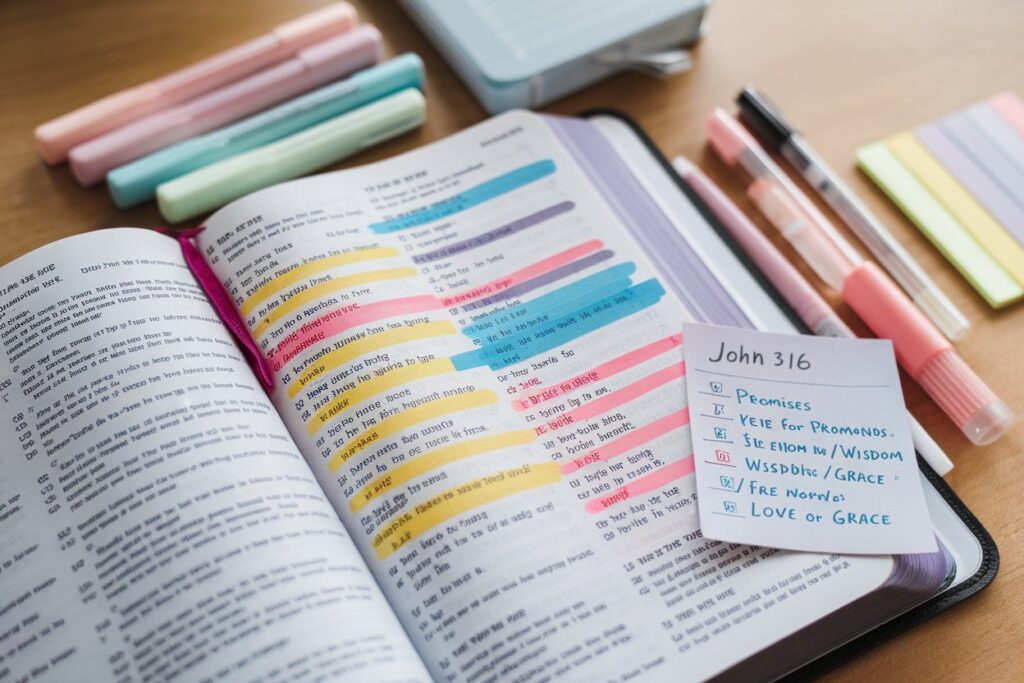
What Are the Best Highlighters for Bible Journaling?
Finding highlighters that won’t bleed through thin Bible pages can be challenging. After testing dozens of options, here are my top recommendations:
1. Zebra Mildliners
These are my absolute favorite for several reasons:
- Dual-tip design (chisel and fine point)
- Subtle, pastel colors that don’t overwhelm text
- Minimal bleed-through on most Bible papers
- Available in 25+ colors for varied color-coding
I use these daily and have never had significant bleeding issues, even on standard Bible paper.
2. Accu-Gel Bible Hi-Gliders
Designed specifically for Bible paper:
- Gel-based ink that doesn’t saturate paper
- Clear window tip lets you see what you’re highlighting
- Available in traditional yellow plus several other colors
- Ideal for precise highlighting of specific words
These are what I recommend to friends who are nervous about highlighting in their Bibles.
3. Tombow Kei Coat Double-Sided Highlighters
Another excellent option:
- Very gentle on Bible paper
- Dual-tip design
- Erasable highlighter on one end
- Unique colors not found in other brands
4. Faber-Castell Textliner Pastels
Great for those who prefer more traditional highlighting:
- Classic chisel tip
- Dry quickly to prevent smudging
- Subtle pastel colors
- Good coverage without bleeding
5. Bible-Safe Colored Pencils
For those who want zero risk of bleeding:
- Prismacolor Premier or Crayola Twistables
- Can be used for highlighting by applying light pressure
- Multiple colors for different coding systems
- 100% bleed-proof option
I often use colored pencils for older Bibles with very thin paper.
Highlighting Techniques
Beyond choosing the right tools, these techniques help prevent damage:
- Test highlighters on an inconspicuous page first
- Highlight with a light hand, not pressing hard
- Consider underlining instead of highlighting for very thin paper
- Wait a few seconds for the ink to dry before closing your Bible
- Place a piece of paper behind the page you’re highlighting

Can I Bible Journal Digitally?
Absolutely! Digital Bible journaling has become increasingly popular and offers several advantages:
Benefits of Digital Journaling
- No worries about bleed-through or mistakes
- Unlimited colors and tools at your fingertips
- Easy to erase, undo, or modify your work
- Ability to share your journaling instantly
- Takes up no physical space
During the pandemic lockdowns, I experimented with digital journaling and found it incredibly freeing to create without fear of ruining a physical Bible.
Digital Journaling Tools
Apps and Software
- Procreate: The gold standard for iPad artists ($9.99 one-time purchase)
- GoodNotes: This is Perfect for handwritten notes and simple illustrations ($8.99)
- YouVersion Bible App: Includes highlighting and note-taking features (free)
- Logos Bible Software: Advanced study tools with note-taking capabilities (subscription-based)
I personally use GoodNotes for text-heavy journaling and Procreate when I want to create more artistic entries.
Required Hardware
- Tablet with stylus support (iPad with Apple Pencil is ideal)
- Stylus or digital pen for precise writing and drawing
- Optional: Matte screen protector for a paper-like feel
Getting Started with Digital Journaling
- Choose your platform: Select a Bible app or note-taking app that suits your needs
- Set up templates: Create or download templates with Bible text and journaling space
- Organize your digital journals: Use folders or notebooks to organize by topic or Bible book
- Learn basic tools: Familiarize yourself with pens, highlighters, and layer functions
- Back up your work: Ensure your digital journaling is backed up to cloud storage
Combining Physical and Digital Journaling
Many people, myself included, enjoy a hybrid approach:
- Use digital tools for planning or practicing complex designs
- Create digital elements to print and paste into physical Bibles
- Photograph physical journaling pages to share digitally
- Use digital for study notes and physical for artistic expression
I often sketch ideas digitally first, then recreate them in my physical journaling Bible once I’m happy with the design.
How Do I Incorporate Art or Watercolor into Bible Journaling?
Adding watercolor to Bible journaling creates beautiful, expressive pages. Here’s how to do it safely:
Preparing Your Bible Page
Before applying any wet media:
- Apply clear gesso: This primer creates a protective barrier between the paint and the Bible page
- Apply a thin, even coat with a foam brush
- Allow to dry completely (usually 24 hours)
- Gently sand if the texture is too rough
- Test in an inconspicuous area: Before working on an important passage, test your technique on the back page
- Place protective material: Put several sheets of paper or a plastic mat behind your page to protect other pages
The first time I used watercolors without gesso was a disaster—the paint soaked through several pages! Now, I never skip the gesso step.
Beginner-Friendly Watercolor Techniques
Start with these simple approaches:
1. Watercolor Washes
Create gentle background colors:
- Mix watercolor with plenty of water for a light tint
- Apply with a broad, barely damp brush
- Use a paper towel to blot excess moisture
- Allow to dry completely before adding details
2. Watercolor Pencils
These offer more control:
- Color lightly with watercolor pencils
- Use a barely damp brush to activate and blend the color
- Work in small sections to control the water
- Build up layers gradually for deeper colors
3. Wet-on-Dry Technique
For more precise application:
- Apply water to your brush, then pick up color
- Touch the brush to dry paper for controlled color placement
- Use minimal water to prevent warping
4. Simple Watercolor Motifs
Try these beginner-friendly designs:
- Gradient backgrounds
- Simple floral elements
- Abstract shapes
- Gentle color blocking
I started with basic watercolor backgrounds and gradually worked up to more detailed elements as my skills improved.
Tips for Successful Watercolor Bible Journaling
- Use quality supplies: Student-grade watercolors often contain more fillers and can be harder to control
- Less is more: Start with minimal water and build up gradually
- Have patience: Allow each layer to dry completely before adding more
- Keep a paper towel handy: Blot your brush frequently to control moisture
- Practice first: Try techniques in a sketchbook before applying to your Bible
Alternative Art Mediums for Bible Pages
If watercolor seems intimidating, consider these alternatives:
- Colored pencils: Blend beautifully with no bleeding risk
- Gelatos: Creamy color sticks that can be blended with minimal moisture
- Acrylic paint: Apply very dry with a foam dabber for minimal saturation
- Pan pastels: Apply with sponge applicators for soft, controllable color
What Are Some Bible Journaling Prompts?
Sometimes, the hardest part of Bible journaling is knowing where to start. Here are prompts I’ve found helpful:
Verse-Focused Prompts
Select a verse and reflect on:
- What does this verse reveal about God’s character?
- How does this verse challenge or encourage me today?
- What keywords stand out, and why?
- How might I apply this truth in my daily life?
- What visual imagery does this verse evoke?
Topical Journaling Prompts
Explore verses related to specific topics:
For Anxiety and Stress
- Philippians 4:6-7 (prayer and peace)
- Matthew 6:25-34 (worry and God’s provision)
- Psalm 55:22 (casting burdens on God)
For Gratitude
- Psalm 107:1 (giving thanks)
- 1 Thessalonians 5:18 (thankfulness in all circumstances)
- Colossians 3:15-17 (thankful hearts)
For Identity in Christ
- Ephesians 2:10 (God’s workmanship)
- 2 Corinthians 5:17 (new creation)
- 1 Peter 2:9 (chosen people)
For Hope and Encouragement
- Romans 15:13 (God of hope)
- Jeremiah 29:11 (plans for welfare)
- Isaiah 40:31 (renewed strength)
Seasonal and Life-Event Prompts
Loss: Psalm 34:18 (broken hearts)
New Year: Isaiah 43:19 (new things)
Spring: Song of Solomon 2:11-12 (new growth)
Challenges: James 1:2-4 (trials and perseverance)
Celebration: Psalm 118:24 (rejoicing)
Creative Challenge Prompts
Try these to stretch your journaling creativity:
- Use only one color in your entire entry
- Create without words—only images and symbols
- Focus on a single word from a verse and explore it deeply
- Try a new artistic technique you’ve never used before
- Journal the same verse in different styles across a week
When I feel stuck in a creative rut, these challenges help me approach the Scripture with fresh eyes.
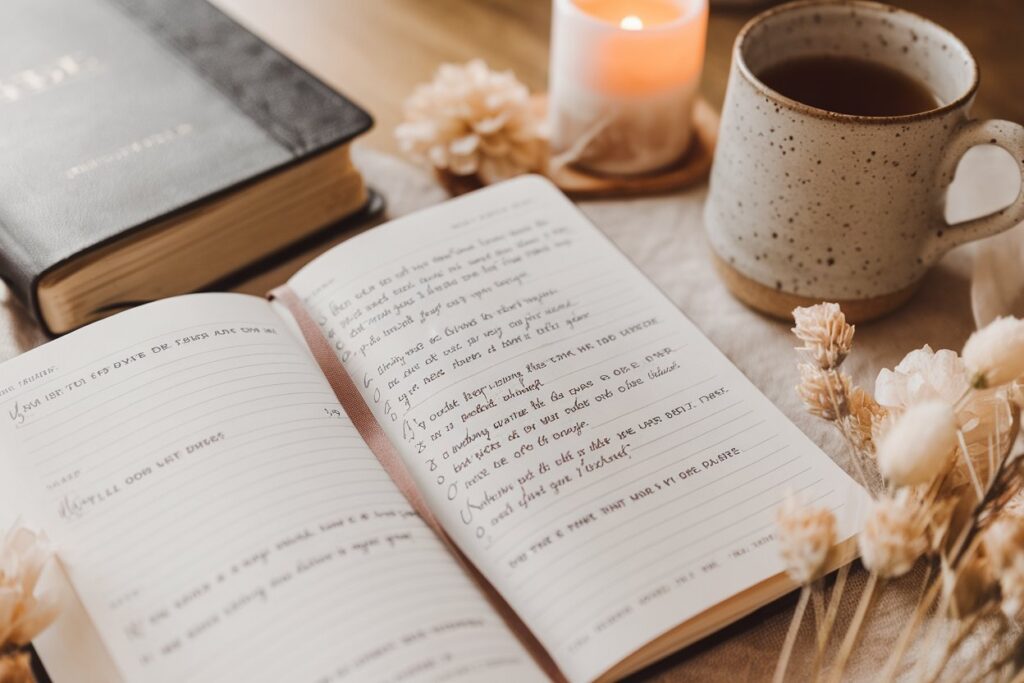
How Do I Reflect on Scripture While Journaling?
Bible journaling is more than artistic expression—it’s primarily about deepening your relationship with God through His Word. Here are effective reflection techniques I’ve incorporated into my practice:
The SOAP Method
This simple but powerful approach provides structure for meaningful reflection:
- S – Scripture: Write out the verse or passage
- O – Observation: Note what stands out to you (Who? What? When? Where? Why? How?)
- A – Application: Consider how this truth applies to your life today
- P – Prayer: Respond to God based on what you’ve learned
I use this method when I want to ensure I’m engaging with the text deeply rather than just creating art.
Verse Mapping
This technique involves breaking down a verse to understand its deeper meaning:
- Write the verse in the center of your page
- Look up keywords in a concordance or lexicon
- Note cross-references to related verses
- Record historical or cultural context
- Draw connections between concepts
- Write your personal reflections
Verse mapping transformed my understanding of familiar passages by revealing layers of meaning I had missed.
The 5 W’s Method
Ask these fundamental questions:
- Who wrote this, and to whom?
- What is the main message?
- When was it written?
- Where does this fit in the bigger biblical narrative?
- Why is this significant?
These questions help me place verses in their proper context rather than isolating them.
Lectio Divina in Journaling
This ancient practice of sacred reading adapts beautifully to Bible journaling:
- Read (Lectio): Slowly read the passage several times
- Reflect (Meditatio): Meditate on the words and phrases that stand out
- Respond (Oratio): Write or illustrate your response to God
- Rest (Contemplatio): Sit quietly, allowing God’s Word to sink deeply into your heart
I often mark different parts of this process with different colors or symbols in my journaling.
Emotional Connection
Connect Scripture to your emotional life:
- What feelings does this passage evoke?
- How does this truth address my current emotional state?
- What emotions might the original audience have felt?
Some of my most meaningful journal entries come from recording how Scripture intersects with my emotional journey.
Is Bible Journaling a Form of Worship?
In my experience, Bible journaling can absolutely be a form of worship—a way of honoring God with our time, attention, and creativity. Here’s why:
Creative Expression as Spiritual Devotion
The Bible tells us we are made in the image of God—the ultimate Creator (Genesis 1:27). When we create as a response to His Word, we reflect a small portion of His creative nature.
I’ve found that using my creativity in Bible journaling helps me connect with God in ways that traditional Bible study sometimes doesn’t. It engages different parts of my brain and heart, allowing for deeper processing and internalization of Scripture.
Time and Attention as Offering
In our busy, distraction-filled world, dedicating focused time to engage with God’s Word is itself an act of worship. Bible journaling encourages us to slow down and truly savor Scripture rather than rushing through our reading.
When I spend an hour with a single verse—writing it, illustrating it, reflecting on it—I’m offering God my undivided attention, which feels like a meaningful act of devotion.
Personal Response to God’s Word
Worship is, at its core, a response to who God is and what He has done. Bible journaling creates space for our personal, authentic response to specific truths about God revealed in Scripture.
Through colors, symbols, written prayers, or artistic interpretations, we can express gratitude, awe, repentance, or joy in response to God’s Word—all elements of true worship.
Transformation Through Engagement
Romans 12:2 talks about being “transformed by the renewing of your mind.” Bible journaling facilitates this transformation by helping us engage deeply with God’s truth, internalize it, and live it out.
I’ve noticed that verses I’ve journaled stay with me throughout the day, influencing my thoughts and actions in ways that simple reading sometimes doesn’t.
Community and Sharing
While Bible journaling can be a private practice, it also creates opportunities to share God’s Word with others—another aspect of worship. Whether through social media, small groups, or one-on-one sharing, our journaling can point others to God’s truth.
Some of my most meaningful spiritual conversations have started when someone asked about my journaling Bible or when I shared an entry online.
How Do I Date or Organize Journal Entries in My Bible?
Keeping your Bible journaling organized helps you track your spiritual journey and find specific entries later. Here are effective strategies:
Dating Your Entries
Simple ways to record when you created each entry:
- Write the date in small text near your journaling
- Create a consistent date format (I use MM/DD/YY in the upper corner)
- Use a date stamp for consistency
- Include the year at minimum, even if you don’t note the exact date
Looking back at dated entries allows me to see how God has worked in my life over time.
Organizational Systems
Consider these approaches to organizing your journaling:
1. Color-Coding
Develop a consistent color system:
- Assign specific colors to different topics or themes
- Use colored tabs or washi tape to mark pages
- Create a color key at the beginning of your Bible
My system uses blue for verses about peace, green for growth, purple for God’s character, and orange for commands/instructions.
2. Symbols and Icons
Create a personal set of symbols:
- Use simple drawings as visual shorthand
- Place small symbols in margins to indicate themes
- Develop a symbol key in the front of your Bible
I use a small mountain for God’s strength, a heart for love, a lighthouse for guidance, and so on.
3. Indexing
Create a reference system:
- Reserve blank pages at the front or back of your Bible for an index
- List topics with corresponding page numbers or Scripture references
- Update your index regularly as you add entries
4. Chronological Journaling
Some journalers prefer to work through Scripture sequentially:
- Start at Genesis and work forward
- Follow a Bible-in-a-year plan for journaling
- Date each entry to track your progress
5. Digital Tracking
Supplement your physical journaling with digital organization:
- Photograph completed pages
- Create digital folders organized by theme or date
- Use Bible journaling apps to track your entries
I maintain a simple spreadsheet listing verses I’ve journaled, the date, and key themes, making it easy to find specific entries later.
Finding Balance: Art vs. Readability
As you organize your Bible, consider these practical tips:
- Leave some margin space unmarked for future notes
- Ensure your organizational system doesn’t obscure the text
- Balance beautiful artwork with functional navigation
- Consider using lighter colors for organizational elements
What Are the Benefits of Bible Journaling?
After years of Bible journaling, I’ve experienced numerous benefits that have enriched my spiritual life. Here are the most significant:
Deeper Scripture Engagement
Bible journaling naturally extends the time you spend with each verse or passage. Instead of quickly reading and moving on, you’re dwelling on God’s Word—examining it, processing it, and responding to it.
I’ve found that verses I’ve journaled remain with me far longer than those I’ve simply read. The physical act of writing, drawing, or coloring helps encode Scripture more deeply in my memory.
Improved Biblical Understanding
The reflection methods used in Bible journaling promote deeper understanding:
- Looking up word meanings
- Connecting related verses
- Considering context and background
- Identifying key principles and applications
This active engagement leads to richer comprehension than passive reading alone.
Emotional Connection to Scripture
Bible journaling creates an emotional pathway to God’s Word. By responding artistically to Scripture, you connect with it not just intellectually but also emotionally and creatively.
During a period of grief, journaling through the Psalms helped me express emotions I struggled to verbalize in prayer. The creative process became a form of emotional processing with God.
Stress Reduction and Mindfulness
The focused, creative nature of Bible journaling has meditative qualities that reduce stress and promote mindfulness. It’s difficult to worry about other things when you’re concentrating on lettering a verse or creating a related illustration.
Many journalers, myself included, find the practice calming and centering—a welcome respite from our notification-filled lives.
Personalized Spiritual Record
Over time, your journaling Bible becomes a visual record of your spiritual journey—documenting insights, prayers, struggles, and growth. This creates a powerful legacy for yourself and potentially for others.
Looking back through my journaling from five years ago reveals how God has been faithful during difficult seasons and how certain themes have been consistent in my walk with Him.
Enhanced Prayer Life
Bible journaling often naturally flows into prayer as you respond to what you’re reading. Many journalers incorporate written prayers directly into their entries.
I frequently find myself pausing mid-journaling to pray about what I’m learning or how a particular verse is speaking to my situation.

Community Connection
While Bible journaling can be a solitary practice, it also creates opportunities for spiritual community:
- Bible journaling groups (in-person or online)
- Sharing insights from your journaling
- Teaching techniques to others
- Gifting journaling Bibles or supplies
Some of my deepest spiritual friendships have developed through shared Bible journaling experiences.
Creative Expression of Faith
For many of us, Bible journaling provides a unique outlet for expressing faith through creativity—something that might be missing in more traditional spiritual disciplines.
As someone who doesn’t consider herself particularly artistic, Bible journaling has helped me discover and develop creative gifts I didn’t know I had.
How Do I Avoid Ruining My Bible Pages While Journaling?
This is a common concern, especially for beginners. Here are practical strategies to keep your Bible in good condition while journaling:
Preventative Measures
1. Always Test First
Before using any new supply in your Bible:
- Test it on an inconspicuous page (like the concordance)
- Wait a few minutes to check for bleed-through
- Test on both sides of the page if possible
This simple habit has saved me countless times from supplies that seemed safe but weren’t.
2. Use Protective Sheets
Always place something behind your working page:
- Archival plastic sheet protectors
- Cardstock or multiple sheets of paper
- Specialized Bible journaling mats
I keep a thin plastic sheet in my Bible specifically for this purpose and move it to whatever page I’m working on.
3. Prepare Pages When Needed
For wet media or heavy application:
- Apply clear gesso as a protective primer
- Allow full drying time before working
- Consider matte medium for particular techniques
4. Work in Stages
Patience prevents many mistakes:
- Allow each layer to dry completely before adding more
- Work from light to dark colors
- Start with a pencil for layouts before committing to pen
Recovery Techniques
If mistakes happen despite your precautions:
1. Minor Pen Mistakes
For small errors:
- Use a white gel pen to cover minor mistakes
- Place decorative elements (stickers, washi tape) over errors
- Incorporate the mistake into your design
- Use correction tape for text-only errors
2. Bleed-Through Issues
If ink seeps through:
- Apply a thin layer of gesso to the affected reverse side
- Use decorative paper or washi tape to cover the area
- Create a coordinating design on the reverse side
- Use Bible-specific repair tape for severe cases
3. Page Tearing or Damage
For physical damage:
- Apply archival book repair tape to torn edges
- Use washi tape for decorative repairs
- Consider using tip-ins (inserted pages) to replace severely damaged pages
I once accidentally tore a page while zealously erasing a mistake. Rather than panicking, I used decorative washi tape to repair the tear and incorporated it into my design.
Mindset Matters
Remember that perfection isn’t the goal:
- View minor imperfections as part of your journaling journey
- Focus on the spiritual benefit rather than artistic perfection
- Remember that your Bible is a working document, not a museum piece
Some of my most meaningful entries aren’t my most visually perfect ones—they’re the ones where I was most deeply engaged with the Scripture, regardless of artistic outcome.
Conclusion
Bible journaling offers a unique and meaningful way to engage with Scripture, combining creativity with spiritual growth. Whether you’re artistically inclined or simply looking for a fresh approach to Bible study, journaling can transform your relationship with God’s Word.
As we’ve explored, you don’t need expensive supplies or artistic training to get started—just a willing heart and a desire to connect more deeply with Scripture. Begin with simple techniques and basic supplies, then expand your skills and collection as you grow more comfortable.
Remember that Bible journaling is primarily about spending time with God and internalizing His Word. The artistic elements enhance this process but aren’t the main focus. Some days, your journaling might be elaborate artwork; other days, it might be simple notes and reflections. Both are valuable and meaningful.
I encourage you to start your Bible journaling journey today. Choose a verse that speaks to your heart, gather a few simple supplies, and respond to God’s Word in whatever way feels authentic to you. You may be surprised by how this practice deepens your faith and brings Scripture to life in new ways.
Your Next Steps
- Choose your Bible: Decide whether to use your current Bible or invest in a journaling Bible
- Gather basic supplies: Start with no-bleed pens, colored pencils, and washi tape
- Select a meaningful verse: Begin with a passage that resonates with you personally
- Set aside regular time: Commit to consistent Bible journaling sessions
- Join a community: Connect with other Bible journalers for inspiration and encouragement
The journey of Bible journaling is both personal and communal, both artistic and spiritual. As you begin or continue this practice, may it bring you closer to the heart of God and deeper into His life-transforming Word.
What Bible journaling questions do you have? Share them in the comments below, and let us know how this creative practice has impacted your faith journey!